Google Docs: Getting Started Guide
When working with a word processing application like Google Docs, it's important to be comfortable with the document interface and to know how perform basic tasks. In this lesson, you'll get to know the interface and learn how to configure the document page.
Watch the video below to learn how to navigate the Google Docs interface and set up your first document.
The Google Docs interface
The Google Docs interface includes the toolbar at the top of the screen, as well as the document itself. It allows you to type and modify text, in addition to sharing a document with others.

Document Title
Google Docs displays the title of your document here and on your Google Docs homepage. By default, new documents are named Untitled document. Click the title to change the document name.
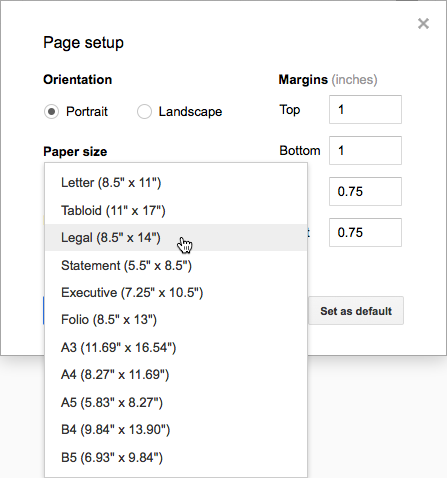
Page setup options
When you first create a Google document, you may want to change page setup options like page orientation, margins, or paper size, depending on the type of document you are creating. You can access these options by clicking Page setup in the File menu.

In the Page setup dialogue, you can customize several options:
- Page orientation is whether your page is oriented in portrait or landscape format. Landscape format means the page is oriented horizontally, while portrait format means it is oriented vertically.
- Page margins are the gaps between the body of the document and the edge of the page.
- Paper size lets you change the dimensions of the page. This is particularly useful if you are printing the document on a custom paper size.
- Page color is the background color of the document. This may be useful as a decorative option if you plan on publishing your document on the Web.


Add colors and styles
To change margins, page color, and orientation, click File > Page setup.
Use the toolbar to customize your document further. Here are some highlights:


Add pictures, links, tables, and more
The Insert menu lets you add different features to your document. Here are the highlights:
Image—Insert an image from your computer, the web, or Drive.
Link—Add a link to another page or to a header or bookmark in the same document.
Drawing—Create shapes, pictures, and diagrams right in your document.
Table—Select the number of columns and rows to create a table.
Bookmark—Add shortcuts to specific places within your document.
Table of contents—Create an auto-generated table of contents that links to each heading in your document that has a heading style applied.

Create page columns
If you’re working on an academic paper or another large document, you can organize your text in columns.
Create page columns:
- Click Format > Columns.
- Select the number of columns you want.
- (Optional) To adjust the spacing, or add lines between column, click Format > Columns > More options.
- Click Apply.

Download versions in other formats
To download your document so it can be opened by other programs, click File > Download as and choose one of the following formats:
- Microsoft Word (.docx)
- OpenDocument Format (.odt)
- Rich Text Format (.rtf)
- PDF Document (.pdf)
- Plain text (.txt)
- Web page (.html, zipped)

Email a copy as an attachment
If you need to collaborate with someone on your document in a different program or format, such as Word or PDF, you can email it as an attachment. However, this sends a copy of the document instead of sharing the original, so you won’t be able to use Doc’s collaboration tools.
- Click File > Email as attachment.
- Select a format.
- Enter the email addresses or Groups you want to send copies to.
- (Optional) Enter a message.
- Click Send.
