Sending a Fax using eFax

EOI has introduced eFax as of August 30th, 2017 and here is a break down of how to use it.
Sending Faxes
eFax allows you to send a file attachment to a fax machine using your email account.
Creating and Sending a New Fax
1. Create a new email.
2. Enter the fax number in the address field followed by @efaxsend.com.
For example, if you need to send a fax to 1(888)532-9265 then you would type in the "To:" field of the email the following:
18885329265@efaxsend.com
Remember: US & Canada fax numbers must be 11 digits. Always use the “1” in front of the ten digit fax number.
3. Attach the document that you need to fax as you normally would attach any file. You can fax up to four documents in one email. They will be faxed in the order they were attached. eFax supports most file type attachments including, but not limited to, DOC, PDF, TXT, TIF, JPG, XLS and HTML.
eFax does not support password protected files. But all documents sent are encyrpted in transit.
4. Send the email out as normal.
Optional: Include a Cover Page
When sending a fax by email you can control whether to include a cover page. Use either a standard cover-page template provided by eFax or include one in your file attachment. By default, eFax will send a cover page using the standard cover-page template as shown below:
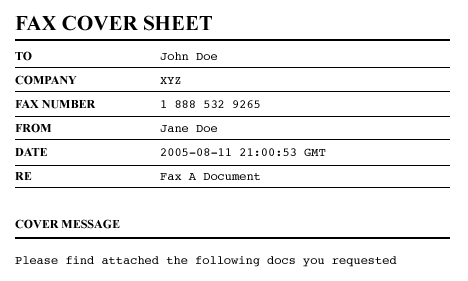
Any text in the body of the email will activate the eFax automated cover page option.
Text in the body of the email will appear in the comments area of the cover page.
Text in the subject field of the email will appear in the RE line of the cover page.
To fill in the TO, FAX NUMBER and COMPANY lines on the cover page type your information in the following format into the "To:" field of the email:
“John Doe{Company}”<18005551212@efaxsend.com>